Introduction: Building your own PC from scratch is an exciting and rewarding experience. Not only does it give you complete control over the components, but it also allows for customization to suit your specific needs. In this comprehensive guide, we’ll walk you through the components required and provide detailed step-by-step instructions on assembling your dream PC.
Certainly! Here’s an SEO-friendly guide for building a custom PC:
Title: Ultimate Guide to Building Your Own Custom PC from Scratch – Step-by-Step
Introduction: Building your own PC from scratch is an exciting and rewarding experience. Not only does it give you complete control over the components, but it also allows for customization to suit your specific needs. In this comprehensive guide, we’ll walk you through the components required and provide detailed step-by-step instructions on assembling your dream PC.
Section 1: Understanding the Essential Components
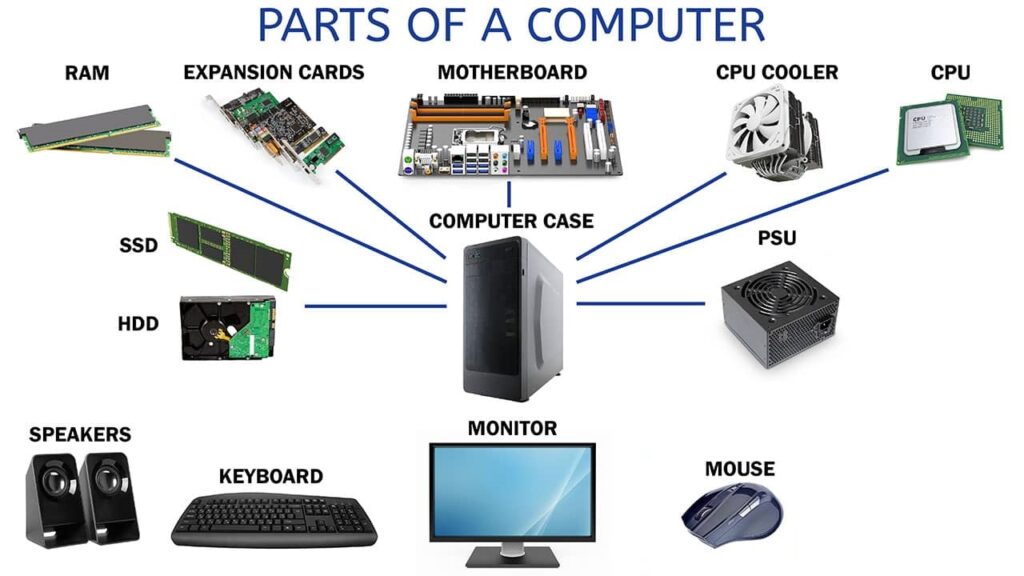
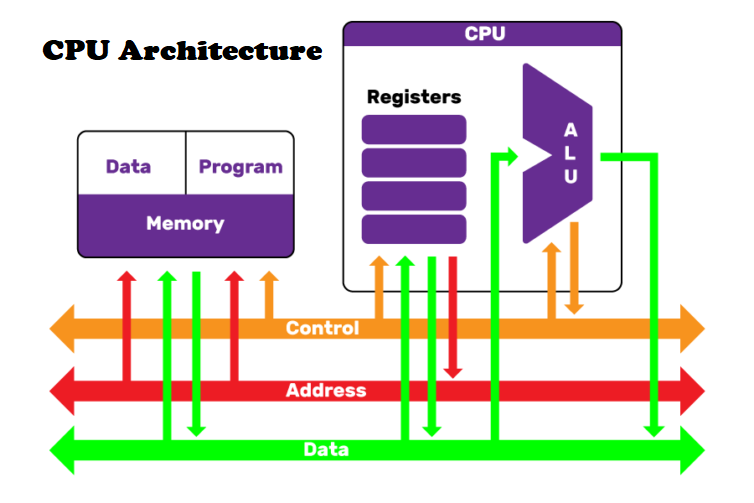
- Processor (CPU): Explore the importance of the CPU as the brain of your computer. Discuss different models, cores, and speeds suitable for various tasks.
- Motherboard: Explain how the motherboard acts as the backbone, connecting all components. Discuss compatibility with CPU, RAM, and other hardware.
- Memory (RAM): Detail the significance of RAM in multitasking and choosing the right capacity and speed for optimal performance.
- Storage Drives: Compare SSDs and HDDs, detailing their speed, capacity, and purposes in storage.
- Graphics Card (GPU): Discuss the GPU’s role in gaming and graphics-intensive tasks, mentioning different models and their capabilities.
- Power Supply Unit (PSU): Explain how to select the right wattage and efficiency for your PC’s power needs.
- Cooling System: Discuss air vs. liquid cooling options and their importance in maintaining optimal temperatures.
Section 2: Step-by-Step Assembly Guide
- Preparation: Outline the tools required and the importance of a clean workspace.
- Installing the CPU: Step-by-step instructions on properly seating the CPU onto the motherboard.
- Mounting the Motherboard: Guide on aligning the motherboard into the case and securing it properly.
- Installing RAM and Storage: Detailed steps on inserting RAM modules and mounting SSDs/HDDs.
- Installing the Graphics Card: Instructions on inserting the GPU into the designated slot.
- Connecting Cables and Power Supply: Guidance on cable management and connecting power cables to components.
- Testing and Booting Up: Steps for the initial boot and BIOS setup to ensure everything is functioning correctly.
Conclusion: Congratulations! You’ve successfully assembled your custom PC. Building your own computer not only saves money but also allows for personalization and upgradeability. Embrace the experience and enjoy the satisfaction of creating a machine tailored to your needs.